Crochet Doodle Keychains: Free Pattern

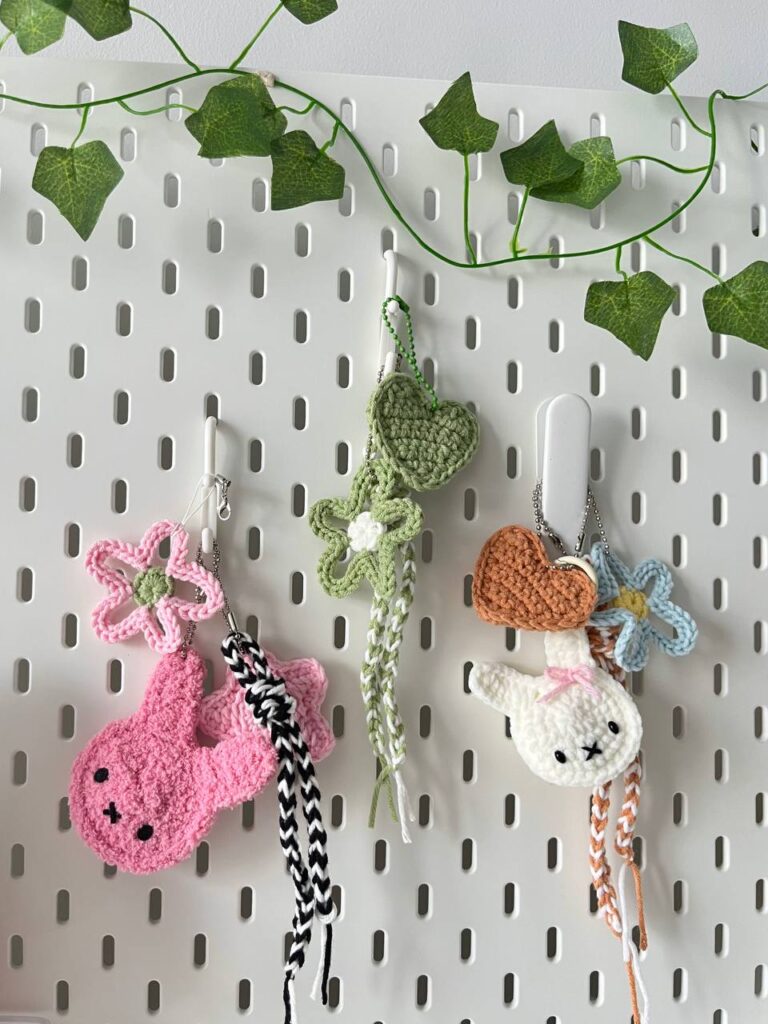
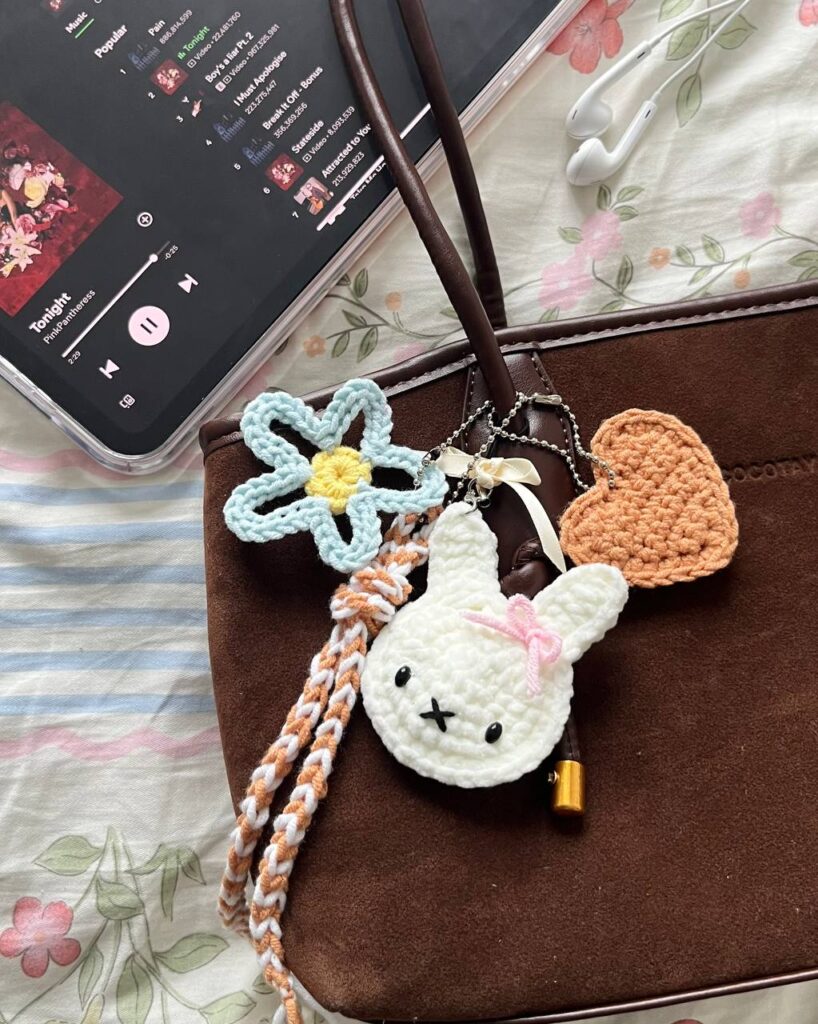
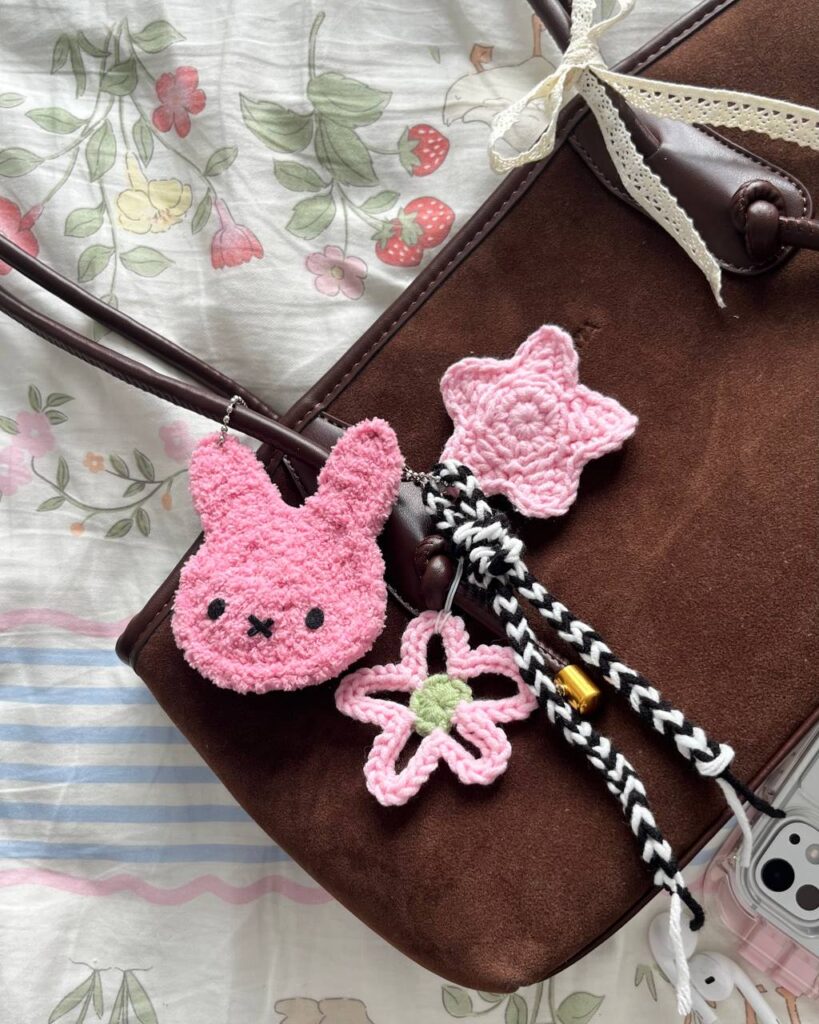
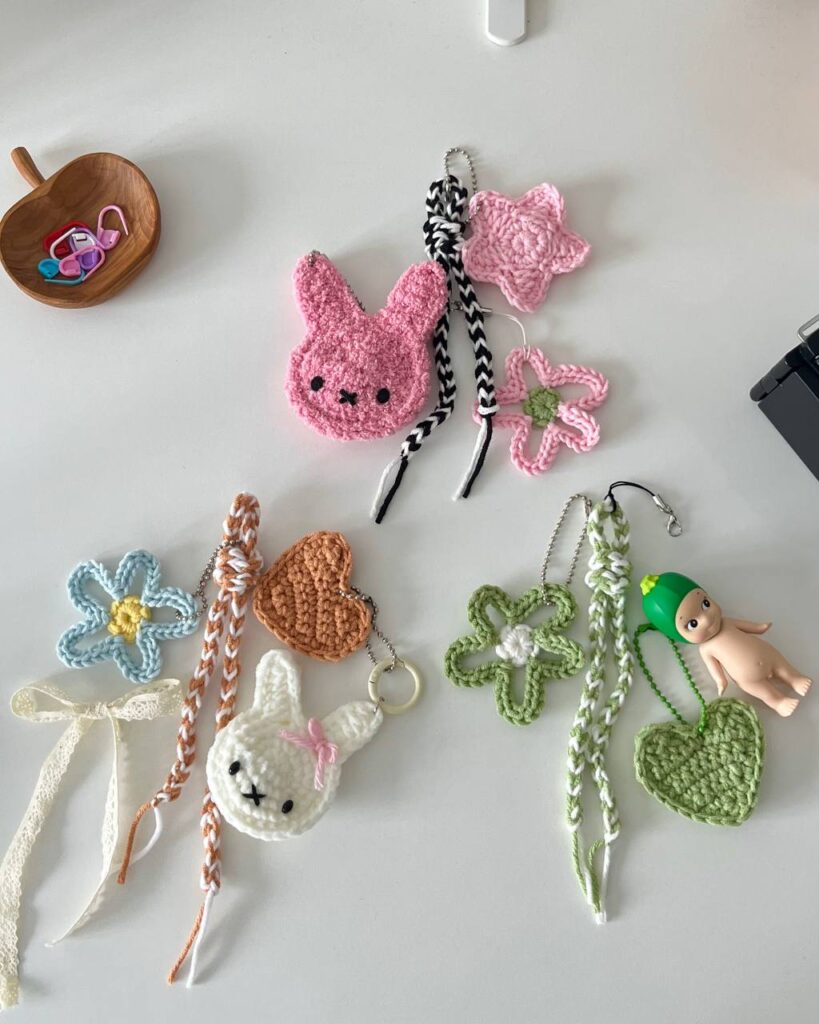
Welcome to crochet keychain episode 3! In this episode, I decided to go for a cute, colorful and messy aesthetic vibe keychains. These doodle-inspired keychains are the perfect bite-sized makes! This series includes a star, flower, Miffy-style head, heart, and a simple cord-like string which go well with any keychain you might have. Whether you’re personalizing your keys, backpack, or gifting a handmade charm to a friend, these little pieces are beginner-friendly, fast to make, and full of personality.
Hope you guys enjoy this episode as well. Click here to see my previous episode of this series where you guys absolutely fell in love as well.
Copyright Notice @chubbiesbyash__ The crochet patterns shared on this blog are designed by me and are for personal use only. You are welcome to sell any finished items made from these patterns, but mass production and selling the patterns themselves are not allowed. Please don’t use the photos from this blog without permission. If you share your creations, I’d appreciate it if you credit me with a link to my blog, Instagram or YouTube channel as this helps me grow as a creator. Thanks for your support!
Do not miss out any details! Open this video as you crochet along to make the process more effective and time-saving.
Materials Needed
- Cotton, Acrylic or Sports yarn (5ply size) in any color you prefer
- 3mm crochet hook
- Stitch markers, darning needle and scissors
Crochet Abbreviations
The abbreviations are in US terminology!
- R – round/row
- Ch – chain
- mr – magic ring
- st – stitch
- sc – single crochet
- inc – increase
- dec – decrease
- hdc – half double crochet
- dc – double crochet
- slst – slip stitch
- *- repeat
- [] – total stitch count in each round/row
- sk – skip
Star
Slst & ch1 are NOT included in total stitch count!
Start with a magic ring.
R1 10sc in mr, 1slst [10]
R2 Ch1, (1sc, 1inc)*5, 1slst [15]
R3 Ch1, (Ch4, 1sc, 1hdc, 1dc, sk2, 1slst) *5
- Cut the yarn and make the 2nd applique. Do not cut the yarn after the 2nd one.
Connecting the two pieces
- Place the two appliques together and connect each point with the following pattern.
- Watch this part of the tutorial for a more detailed explanation.
(3sc together, 2ch, 3sc together)*5
Heart
Start with a slip knot.
R1 3ch, 2sc [2]
R2 Ch1 &turn, 2inc [4]
R3 Ch1 & turn,1inc, 2sc, 1inc [6]
R4 Ch1 & turn,1inc, 4sc, 1inc [8]
R5 Ch1 & turn, 8sc [8]
R6 Ch1 & turn, 1inc, 6sc, 1inc [10]
R7 Ch1 & turn, 5sc (crochet only halfway) [5]
R8 Ch1 & turn, 1dec, 1sc, 1dec [3]
R9 Ch1 & turn, 1dec, 1sc [1]
- cut the yarn and start again from the stitches we left at R7.
- Watch this part of the tutorial for a more detailed explanation.
R1 Ch1, 4sc (leaving 1sc in middle) [4]
R2 Ch1 & turn, 2dec [2]
- Cut the yarn & make another one but do not cut the yarn after the 2nd one!
- Crochet the two appliques together with sc along the sides.
Miffy
Start with a slip knot and make 5ch.
Slst & ch1 are NOT included in total stitch count!
R1 Starting from 2nd ch from the hook,1inc, 2sc, 4sc in one, 2sc, 1inc, 1slst [12]
R2 Ch1, (1sc,1inc) *6, 1slst [18]
R3 Ch1, (1sc, 1inc, 1sc) *6, 1slst [24]
R4 Ch1, (3sc, 1inc) *3, 4sc, (Ear: 8ch,1hdc, 5dc), sk2, 2sc, (Ear: 8ch,1hdc, 5dc), sk2, 2sc,1slst
- Make two and join them with sc except for the ear part which will be joined with slst.
Flower
Start with a magic ring.
R1 10sc in mr, 1slst [10]
In the last sc of R10, change to a different color!
R2 (12ch, sk1, 1slst), (10ch, sk1, 1slst), (12ch, sk1, 1slst), (12ch, sk1, 1slst), (10ch, sk1, 1slst)
R3 1slst into each ch made in R2
- Cut the yarn and weave in the ends!
- Extra tip: cut the yarn tails short at the backside of the flower without weaving in, then glue a circle of felt cloth on top of the yarn tails. This way, we can avoid weaving in and can secure the yarn.
Two-colored String
- The string is made of using chains using the two colors in a different way than how we normally do chains. Then the string is tied to form a knot at the top using the snake knot method.
- Watch this part of the tutorial for the string.
And there you have it! You’ve done an amazing job getting this far. Take a moment to admire your work—you’ve put in the effort, and it shows. It might not be perfect, but it’s a reflection of your creativity and dedication, and that’s what truly matters. Be proud of what you’ve accomplished!
[ From Ash ] 𐙚
Hi there🌸
Thank you for checking out my crochet pattern! I hope you find joy and inspiration in the patterns I share.
If you create any amigurumi using my patterns, I would be thrilled and honored if you could give me credit in your posts. Sharing your creations and crediting the pattern helps our crochet community grow and allows others to find and enjoy these patterns too. 🧶✨
I’m grateful for your support and can’t wait to see your beautiful work. Feel free to leave a comment if you have any questions or just want to share your project.
Happy crocheting! ❤️


Post Comment