How to crochet Orchid flowers: Pattern + Tutorial

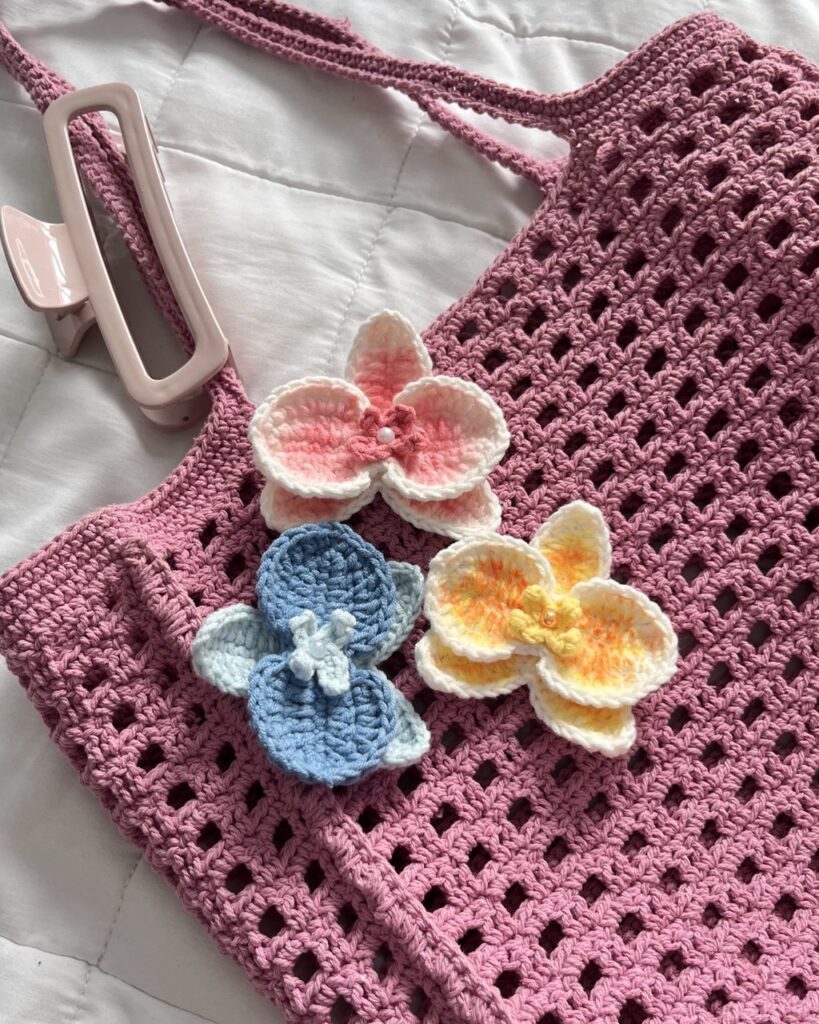
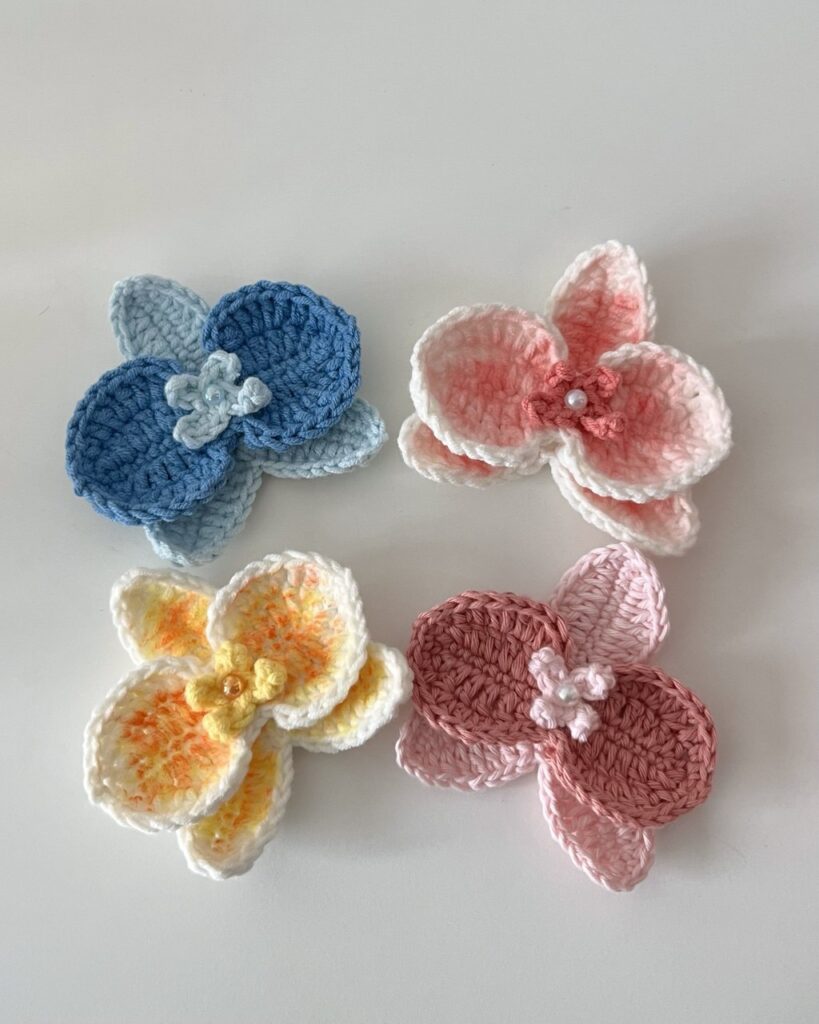
Summer mode: Activated! I’m here to bring something essential to my girly pops this summer: an orchid flower! I’ve been obsessed with orchids for so long, and I literally see them on every social media app I use. One day, I thought to myself, “Why don’t I crochet one myself?”, and it turned out super cute! I was so happy with the result and had fun coloring it with my eyeshadows, blusher, oil pastels, and watercolors. I was basically playing around with all the coloring materials I have lol. (P.S. You don’t need that much, and you don’t even need to color it if you don’t want to!)
I highly suggest making this crochet orchid flower and using it in any way you like. I’ve seen people wear orchid necklaces, hair clips, or use them as keychains! Do yourself a favor and make an orchid this summer!

Copyright Notice @chubbiesbyash__ The crochet patterns shared on this blog are designed by me and are for personal use only. You are welcome to sell any finished items made from these patterns, but mass production and selling the patterns themselves are not allowed. Please don’t use the photos from this blog without permission. If you share your creations, I’d appreciate it if you credit me with a link to my blog, Instagram or YouTube channel as this helps me grow as a creator. Thanks for your support!
Do not miss out any details! Open this video as you crochet along to make the process more effective and time-saving.
Materials Needed
- Cotton(5ply) , Acrylic, or Sport in light blue and dark blue
- 2.5mm & 3mm(optional) crochet hook
- Glue (optional)
- Stitch markers, darning needle and scissors
- Pearls/beads/charms (optional)
Crochet Abbreviations
The abbreviations are in US terminology!
- R – round/row
- Ch – chain
- mr – magic ring
- st – stitch
- sc – single crochet
- inc – increase
- dec – decrease
- hdc – half double crochet
- dc – double crochet
- slst – slip stitch
- *- repeat
- [] – total stitch count in each round/row
- sk – skip
Three-piece petal
Start with a magic ring, using a 2.5mm hook!
R1 (11ch, starting from 2nd ch from the hook, 10sc, 1slst into mr) *3, pull the yarn and close the magic ring.
- In R2, we’ll crochet into each and every stitch of the three pieces we made in R1, including the bottom parts of the ch.
- Watch this part of the tutorial for more details.
R2 Ch1, (1sc, 2hdc, 4dc, 2hdc, 1sc, 2ch, 1sc, 2hdc, 4dc, 2hdc, 1sc) *3
- Cut the yarn leaving a long tail.
Two-piece petal
Start with a magic ring using a 2.5mm hook.
R1 (9ch, starting from 2nd ch from the hook, 8sc, 1slst in mr) *2, pull the yarn and close the magic ring.
R2 Ch1, (1sc, 1hdc, 4dc, 1hdc, 1sc) *4
Highly recommended: switch to a larger hook (e.g 3mm or 4mm) to make R3 to keep the stitches loose and relaxed. If you don’t have a larger hook, it’s also fine but be careful to not crochet too tight. Keep your tension pretty loose!
R3 Ch1, (2slst, 3dc inc, 1dc, 1hdc, 1sc, 2ch, 1sc, 1hdc, 1dc, 3dc inc, 2slst) *2
Mini center petal
Start with a magic ring using a 2.5mm hook.
R1 (4ch, 3sc, 1slst into mr) *2, (3ch, 2sc, 1slst) *2, pull the yarn and close the magic ring.
Assembly
- (Optional) In the three-piece petal section, sew only the upper part of the two bottom petals together, make sure to leave the lower parts open and unsewn.
- Watch this part of the tutorial for more details.
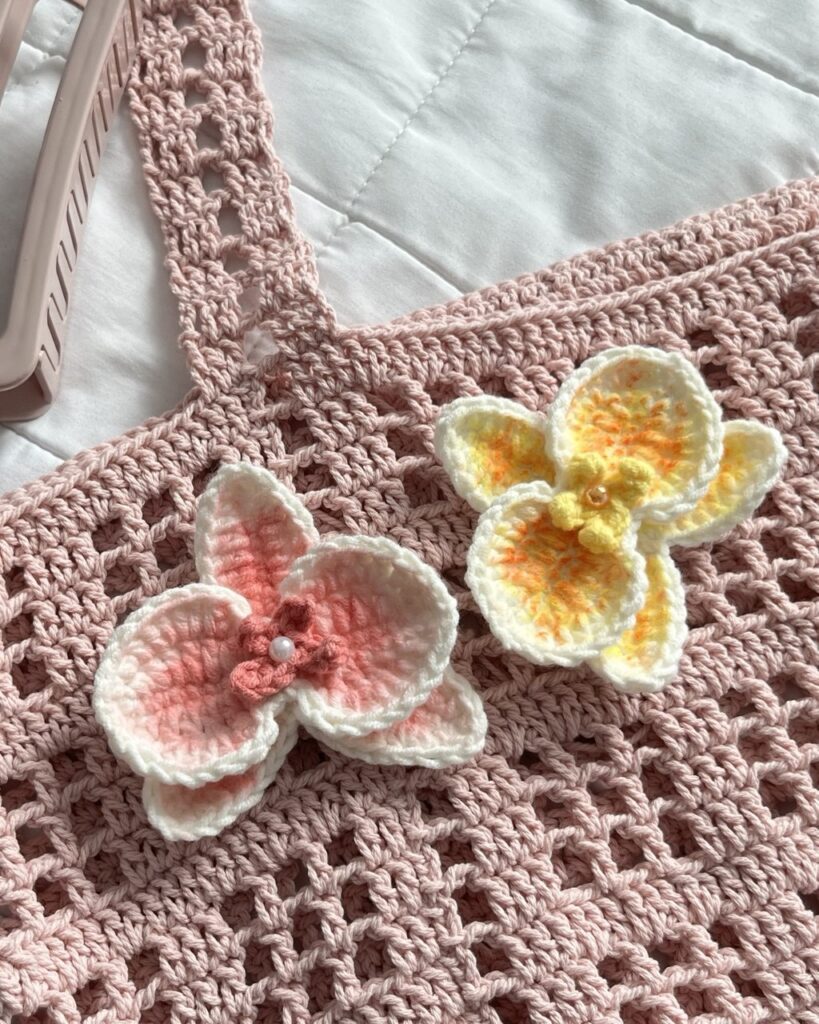
- Sew the two-piece petal on top of the three-piece petal and the mini petal on top of these two in the middle. You can also add small beads or pearls on top of everything to make it pop!
- For coloring, you can use eyeshadow, blusher, oil pastel or watercolor. They are not completely smudge proof and may fade over time but great for testing out and playing around with colors. If you want a permanent paint that doesn’t smudge, I recommend fabric paint but they may be quite hard to use and can get messy if you are not careful.
And there you have it! You’ve done an amazing job getting this far. Take a moment to admire your work—you’ve put in the effort, and it shows. It might not be perfect, but it’s a reflection of your creativity and dedication, and that’s what truly matters. Be proud of what you’ve accomplished!
[ From Ash ] 𐙚
Hi there🌸
Thank you for checking out my crochet pattern! I hope you find joy and inspiration in the patterns I share.
If you create any amigurumi using my patterns, I would be thrilled and honored if you could give me credit in your posts. Sharing your creations and crediting the pattern helps our crochet community grow and allows others to find and enjoy these patterns too. 🧶✨
I’m grateful for your support and can’t wait to see your beautiful work. Feel free to leave a comment if you have any questions or just want to share your project.
Happy crocheting! ❤️
5 comments